Friday, January 28, 2011

CasaSugar's Weekend DIY

Casa is using this weekend to give us lots of Valentine's Day themed DIY ideas.
Check out their website for links & photos:  Weekend DIY

Photo: marthastewart.com
1. Use Handkerchiefs for Pillow Covers
2. Red Doily Matchbox
3 & 4. Heart Garland
5. Egg Carton Lollipop Flowers
6. Heart Shaped Pot Holders
7. Paint Swatches as Valentines Day Cards (ps, they are almost free!)

Photo: Country Living

Have a super weekend everyone. 

Thursday, January 27, 2011

Spring Wedding Decor


One way to make things bright and cheery on a cold, grey day is to think about Spring Weddings!  They are almost a genre all to themselves.  Granted you can have any wedding at any time, but there is just something about spring weddings that puts a little "bright and cheery" into your smile.


If we had the opportunity to have a wedding outside, or at least the reception, we probably would have.  Because of the volatile weather in this area, it would have been a big gamble though, so we went with an indoor wedding.  However, there is something about a spring wedding that just calls for green grass, bright flowers & a day filled with sunshine.


Photo: Project Wedding

This wedding decor special will be a little all over the place, as you can modify your spring wedding to be modern or traditional, rustic or contemporary, colorful or simple.  I'll try to touch on a little of all of it, while embodying what I think of when it comes to spring!

Project Wedding
Flowers:
First I'd like to start with the flowers.  After a long, cold winter, everyone is looking forward to bright and beautiful flowers.  It's also one of the easiest places to add a pop of color.  When I think about weddings, I try to think about what is in season when the wedding is occurring.  Not only will this keep the price of your flowers down, by going seasonal, but it helps to paint the picture of when your wedding is occurring.

What do I think of when I think of Spring Flowers?  Peonies, Peonies & more Peonies.  These flowers are in their prime in May.  They are full and romantic and by far my favorite flower.


Photo: Project Wedding

Photo: The Knot
Another spring flower that I adore: Tulips.  Early in spring, tulips are in full bloom.  These are beautiful for a centerpiece or a bouquet.

Photo: Project Wedding
Here are a few other flower shots to give you some inspiration:
Photo: Project Wedding

Photo: Project Wedding
Decor:
Next I'd like to touch on decor.  You have the opportunity to go with something fun and simple or bold and dramatic that is completely seasonal.  For example - Cherry Blossoms.  Spring is the season of the cherry blossom & cherry blossoms on branches in a clear vase are beautiful as a centerpiece, bar decor, or even aisle decoration.

Photo: Project Wedding

You can still do lovely branch centerpieces.  Because things are still blooming in spring, you can do a branch centerpiece with green buds on the branches.  You can toss in a few roses, or hydrangea, as they are in season throughout the year.

Photo: Project Wedding

Next Exit Photography
 You also have the opportunity to have a couple small vases on each table with just a couple blooms in each one.  This can make a dramatic centerpiece without spending a fortune on flowers.  For extra money savings, alternate and have half of the center pieces be floating candles in a vase with a submerged orchid or cherry blossoms.

Photo: Project Wedding

Photo: Project Wedding
To add a little drama to your ceremony, you can use flower petals on the bright green spring grass, this is a beautiful look.

Photo: Project Wedding
Or you can decorate your aisle, ceremony site or reception with great tissue paper or flower poms.  This s a great DIY project that can be affordable and add a lot of color and drama to your event.

Photo: Project Wedding

Fashion:
One thing I don't touch on much is fashion, however I think that a few quick photos of some great wedding parties can inspire some great color combos.  Also note that all of the dresses do not have to match!  Do you love orange and yellow, but can't choose?  You can use both colors in your bridesmaid dresses.  Put the maid of honor in orange with a yellow sash, and the other maids in yellow.  For the budget bride, have all of your bridesmaids pick a knee-length, flowing dress in any shade of pink or orange or go ultra-bold and allow them to pick any spring shade that goes with your theme.

Photo: Project Wedding

Photo: The Knot

Photo: Sandra Pan Photography

Photo: Project Wedding

I am also a big fan of light suits for spring weddings as opposed to the ultra formal tux.  Everyone wearing beige, light grey or medium grey suits will look amazing for your spring event.

Cakes:
I just want to add a few quick photos of cakes.  You can go modern or traditional, but keeping the florals seasonal and bright and adding just a touch of delicate decor to the cake can make the prefect confection.  These cakes scream spring wedding to me.


Photo: Project Wedding

Photo: Project Wedding
 Spring Color Combos:
For me, spring is about pale and light colors.  The closer you get to summer, the more you get that pop of color.  Below are some of my favorite spring combinations.

Ivory, Light Pink, Beige, Ecru & Peach
White, Pale Yellow & Coral
Ivory, Light Grey, Light Pink, Pale Green
White, Beige, Bright Green & Orange
Ivory, Gold, Pale Yellow & Coral
White, Tiffany Blue, Medium Grey & Light Pink or Yellow
Medium Grey, Light Pink, Medium Pink & White
Dark Grey, Light Grey, Bright Green, Light Green & White

Lavenders, Corals, Oranges, Lemon & Pale Yellow, Greens, Greys, Beige, all of these colors can be mixed in to make a great combination.

Wednesday, January 26, 2011

West Elm Bedding Sale

If you remember, a few weeks ago I did a post about the beauty that is West Elm's Bedding.  Well I just wanted everyone to know that they are having a 20% off sale on their bedding, going on right now!

Hurry over to their site at http://www.westelm.com/ today!

Tuesday, January 25, 2011

Money Saving Tips: Part 2

Happy Tuesday everyone. 

I recently read an article on blunder.com about the 20 best money moves that you can make for this year.  Here is the link: Money Savers - you can also find it in the DIY Everything Section of this blog, under money saving tips.

I wanted to list and give a quick summary of the 20 topics here today, along with some personal insight.  Sorry that there aren't any pictures, and this is a text heavy post, but there is some great information here!  Enjoy.

Image: Link

1. Put your pay-down-debt plan on Auto Pilot:  Essentially this is about automatically taking money out of your paycheck to pay down your credit card debts - more than just the minimum each month, so that you get rid of that balance more quickly.  Something that always amazes me on my credit card bill is a quick chart that they have on the bottom of each bill.  They have a "pay the minimum" category and "pay $150" category.  The minimum payment takes three years to pay off, but the $150 payment takes 12 months.  And that's only on a $800 bill.  THREE YEARS to pay it off when you only pay the minimum.  I can see where this is an item that will save you a ton of money in the long run instead of immediately.

2. Enjoy your 2% bonus:  Because of the recent tax cut, we are all getting an extra 2% in our paychecks.  They recommend investing that 2% instead of spending it.  That way you will never miss it and things like your 401k will benefit in the long run.

3. Make the Most of your 401k Match:  Sort of in line with number 2, they recommend that you max out your 401k to what your company is matching.  Our office hasn't matched our 401k in the past three years, so I cut my contribution back a bit when we took our salary hit, but I didn't quit putting money in all together.  That extra $60 a month for the past two years will make a difference, eventually.

4. Aim for 15%:  They recommend that you put 15% of your salary into a retirement account.  Right now that isn't possible for us, but it's definitely a goal that we can strive for.

5. Put your money in a Roth IRA:  Because this money is pre-taxed, you will not lose a chunk of it when you go to take it out at retirement time.  I started one of these years ago... haven't been able to contribute, but it's started.  I believe that the max you can put in is $4000 a year in my tax bracket, however if you put the money in between January and April, you can double your contribution.

6. Adjust your withholding:  This one is tough for me.  They say that letting the government hold your money all year is a loss for you, but I have to admit that I love getting a big check after tax time.  This one is up to you!

7. Refinance your home:  Again, this one is another wishy-washy one.  First, you have to plan on staying in that house for a while for this to make sense.  You will have to pay an additional closing cost.  This can be lumped into your new mortgage, but doesn't make sense if you are only planning on living there for another 3-5 years.  Also, if you don't have 20% equity in your home, you can also end up owing PMI with a new mortgage, where you may not owe it now.  There is also the gamble that your current mortgage is worth more than your house is.  Because home values have taken a dive for the past three years, our home is actually worth less than the balance of our mortgage.  This is called an upside-down mortgage, and refinancing will do no good.  They won't give you a new mortgage for more than your home is worth.  You also will have to pay for an appraisal of your home.  This may or may not be refunded.  Again, this is a personal judgement call.

8. Write an annual budget:  Not everything can be included in a monthly budget, and as much as we try to predict a monthly amount for home repairs, car repairs, holiday spending, vacations, etc. - it's hard to do with a monthly budget.  They recommend making a yearly one to include all of the overall spending.

9. Automate your Savings:  Have your bank automatically withdraw a set amount from your checking each month and put it into a savings or retirement account.  You need to have a very good grasp of your monthly spending, automatic payments & when checks are deposited to do this, but it's an easy way to save.  When things were better, what I liked to do was have a base amount in my checking account - say $500.  At the end of each month, when all bills were paid, I would take any amount over $500 and put it in the savings.  We haven't been able to do it lately, but it gave me a little more freedom to move what we had left each month, rather than a set amount.

10. Try Cash Only:  You really realize exactly how much you spend when you spend cash.  That $150 at the grocery store is much more real, when it's being paid in cash.  It might make you think twice about that large latte if you can't just throw it on your credit card & you only have $5 left for the week.  This is a difficult one, and you have to be okay with carrying large amounts of cash around each week.  I try using my ATM card at the grocery store and using cash for parking, coffee and a lunch here or there to modify this one for me.

11. Pass on 0% Interest Loans:  Essentially they are saying that if you CAN put down a payment, do it.  You end up financing less.  This is the old school mentality of saving for something before you buy it, instead of paying interest on something you didn't have the money to buy.

12. Get Paid to Shop:  The site recommends a couple of websites to check out, giving cash back for online purchases.

13. Boost your Insurance Deductibles:  Your car insurance payment can go down drastically if you are willing to up your deductible from $500 to $1000.  This is the same for home insurance.  Are you willing to replace your television if it gets stolen as opposed to filing a claim for it?  If so, this might be a way to go.

14. Buy an Umbrella Policy:  They recommend having an umbrella policy for your home, car and any other insurances that you might have.  This can kick in where your liability insurance ends.

15. Save for emergencies:  In this day an age, this is a great one to stick to.  They recommend having 6 months of living expenses in a savings account in case things change financially in your family.  Should someone get laid off, or have to go on medical leave, it's important to have that money available until you can begin working again.

16. Get Life Insurance:  If you have children, this is a must.  Or if you have large amount of debt, you don't want to leave your loved ones with that debt should something happen.  If you are young and healthy, these plans are fairly inexpensive.  We have decided that when we decide to have kids, we'll look into getting more life insurance.

17. Rebalance your Investments:  Take a look at your portfolio, talk with your financial person, and make sure that you have the right amounts allocated in stocks, bonds and cash.

18. Plan for the Uninsured Guy:  They say that a lot more people are cutting car insurance in this tough economic time, and the likelihood that you would get hit by one of these guys goes up.  They recommend raising your coverage to at least $250,000.

19. Save for College: They recommend stocking as much as you can into an interest-free 529 plan for your childrens' college funds.  Even $100 a month could turn into $30,000 after 18 years.

20. Visit a Financial Planner:  This is a great recommendation to get all of your ducks in a row.  Talk to friends and find someone that is well liked.  Getting along with the person handling your investments is of the utmost importance... believe me.

Hope that these tips help - even if you can't do some of them now, it gives you a benchmark of what you should try to achieve.

Sunday, January 23, 2011

Fun Storage #5

Storage Solution number five that I gave you all last week, was the only project that I had yet to try.  Considering I had some cork in my closet, I thought I might try it out.

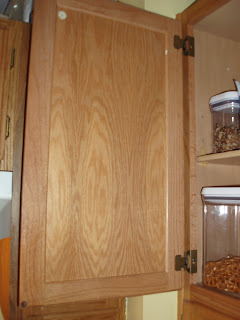
Our pantry cabinet is directly next to our stove.  When we open it, it is even parallel to it.  This is a perfect location to hang up a recipe that you are making without having to take up precious counter space!  It is also the perfect place to hang up a grocery list, so that when you run out of something while you are cooking, there is somewhere to jot it down immediately.

We purchased cork a long while ago for another project that we did, and had some left.  I think it was $5 for a 4-pack at Target.  So, I started with a 12"x12" piece of cork board.


I measured the clear space on the inside of the cabinet at 11-1/8".  So I decided to give the square a little breathing room & I took one inch off one side.  I used a pen to mark the 1", a metal straight edge & an X-acto blade to make the cut.  This left a 12"x11" rectangle that was ready to go.

With the cork, we were provided square stick pads, so I decided to go a little overboard and put a bunch of them on the back.

This is as complicated as the project is.  Here are the before and after pictures of the cabinet:


Because I am not a fan of wasting anything, I decided to take that 1" strip of cork and put it to good use on the lower pantry door.


I decided to cut the strip to the 11" long dimension and put it up at the top of the lower cabinet.  Eventually I'd love to paint the inside of this pantry cabinet with chalkboard paint & I think that the cork is a perfect compliment!

We will be hanging up a grocery list, a list of spice substitutes, our planned meals for the week as well as our non-slip jar openers.  I'm sure we'll find thousands of uses for this cork board.  However there is one alert that I want to give everyone.  The cork that we purchased is about 1/8" thick.  The sticky pads have an insignificant amount of thickness to them.  However, the tacks are about 1/4" long.  Be sure that you don't push the tack in past the cork - it will stick out a bit.  Otherwise, you'll end up with a bunch of holes in the back of your cabinet!

We will be on the hunt for shallow tacks & possibly a small container of chalkboard paint.  This was by far, the easiest project that we have done around the house, literally taking about 10 minutes and $1.25 to complete.

Hope that this inspires you to find the perfect cabinet to deck out with this accessory!

Friday, January 21, 2011

CasaSugar's Weekend DIY

Happy Friday everyone!
It's that time again to pass along Casa's wonderful weekend DIY list
There are some great crafts this week, including a cute Valentines' Day craft.

Photo Credit: Link
1. Burlap Wreath (I love this one, check out the picture above!)
2. Felt Wildflower Coasters (Also super cute!)
3. IPad Cases
4. Fabric Hearts
5. Using Herbs in your Flower Arrangements
6. Modify your Ikea Bed

I plan on getting some burlap this spring to make a new table runner.  Maybe I'll have to save the scraps to make the gem above.  So cute and for any season really!
Check out the whole list with pictures and links here:  Casa's DIY

Thursday, January 20, 2011

Five Fun Storage Solutions

I don't like clutter. 
I'm not a fan of nick-knacks.
I like for everything to have it's place & for everything to be in it's place.

This means that we need a lot of dedicated storage.  Storage for mail, bills, seasonal decoration, everyday decoration, linens, extra pillows, hats, gloves, scarves, board games, cleaning supplies.... the list goes on and on.

Living in a 90-year old house you don't tend to have the storage capacity that one might like built in, so you have to find ways of making-do on your own.  They clearly lived with a lot less back then, hence the 3' wide closets in every room, lack of a large pantry in the kitchen & very little bathroom storage.  We have had to learn to live with this & have come up with lots of little ways to store things in our home.  I'd like to share some of them with you, as well as introduce you to things that we haven't even gotten around to yet.  Here are five quick storage items that could save your house & your sanity!

Magic Storage Item #1:  The Storage Ottoman

This storage item doubles as a great piece of living room furniture
Photo: Real Simple
This item is extremely versatile, useful, and multifunctional.  We have a storage bench in our dining room.  It acts as extra seating when we have guests.  It is also filled with all of our extra living room blankets, table cloths, runners and other miscellaneous linens.  It allows us to store other things in our sideboard in the dining room, and not take up room in a closet with extra blankets.  We have a small storage foot stool.  Not only is it a foot stool, but it stores all of my husband's school work during the week.  We are in the market for yet another bench.  This one will be in our mud room, it will be separated into areas to contain winter outdoor gear, as well as extra purses, bags and grocery bags.  This will free up space on our coat rack and in our cabinets, which will be great.

Magic Storage Item #2: Baskets & Boxes 

I love using baskets for organizing things.  You can take one shelf of a bookcase, put three baskets on it and fill it with odds and ends - stuff that you don't have room for anywhere else and "poof" it's essentially hidden.  It also corrals things into one neat area so that you don't have stuff all over the room.  We have a basket on the shelf in our living room, packed full of extra computer equipment: extra USB drives, Software CDs, cords, extra mouse pads - whatever we need for the computer is stored in this one location, in plain sight, but it looks completely organized. 

Baskets, Bins & Glass Vases keep things organized on these shelves
Photo: Crate & Barrel

Boxes are also another great storage location.  We used this in our mud room makeover.  One box holds all  of our receipts, another holds makeup, cold medication, gauze, band aids - things that we use often, but don't want to have sitting out on a table.  You can get a thin box, set it next to your television and store all of the remotes that you use once in a blue moon.  Put a couple of great accessories on it, and it's essentially invisible.

Photo: Rolling Storage - Crate & Barrel

Both of these options are also very helpful in keeping kids toys organized.  You can get a cube-type storage device (like one similar to the one shown here).  You can get wicker baskets, canvas bins, even plastic bins, tuck them into the cubes and store a ton of kids toys.  This also makes it easier for kids to find things as well as put them away without much hassle.

Magic Storage Item #3:  Glass Vases

DIY Cork Covered Glass Vases
Check out this link for the easy "how-to"
These are also great for visual display or just for gathering things is a decorative way.  You can take a simple glass jar and spray it with a matte finish spray paint.  You can cover a glass vase with fabric, cork (as shown above), or wall paper and use them for a ton of storage solutions - gathering your remotes, collecting change, holding all of your bracelets, storing extra buttons.  You can put 2-3 glass vases of varying sizes on a desk to hold pens, paperclips, business cards - whatever you need.  Grouping a few of these together makes anything look more planned and organized.  Used coordinating colors, keep them clear or cover them with something unique - anyway you choose to use them, they are super useful.  Make sure to use vases that have very thick glass, so that they don't break or chip easily.

Magic Storage Item #4: Napkin Holder

We have two napkin holders in our house, and we don't use either one of them for napkins.  They are great for holding mail.  One of our napkin holders has several compartments, one compartment holds bills to be paid, another holds store coupons another holds current mail ads.  This sits on our entry way table and it's how we deal with the craziness that is our incoming mail.

Photo: Real Simple
Another one is in our kitchen.  It holds recipes waiting to be filed, an address book, directions we have printed and are waiting to use, and other miscellaneous paper that ends up in our kitchen area.  This prevents a pile on a table, and keeps everything in one place!

Magic Storage Item #5: Cork Board Lined Cupboard

This is something that I have just stumbled across recently & it's a great hidden storage place for your kitchen.  Maybe you have found a new recipe that you want to try, or you pull out all the recipes are you are set to make for the week.  You can keep coupons pinned up of things that you don't want to forget to pick up at the store.  You can pin up just about anything you would hang on the fridge & keep that area clutter free.  This is a quick project that I definitely plan on doing soon.  It's as easy as purchasing some cork board squares (which they sell at places like Target) and some sticky dots or double-sided tape.

Photo: www.younghouselove.com
If you are counting calories, it's a convenient place to hang up lists of how many calories are in your favorite items.  Also, if you like to put your food in air-tight containers and throw away the originally packaging (recycle it please!) This is also a great place to cut out and hang up the nutritional information for the food that is now in the storage bins.

We have things hidden in storage all over our house - a coffee table with a shelf on the bottom, bookcases, sideboard in the dining room - anything to give everything a home, so that you never have to wonder where something goes again!

Wednesday, January 19, 2011

Blue & Green Inspiration Board

A friend of mine asked me to do an inspiration board.  She was looking for a kid's room using great, vibrant blue and green colors.  Being that blue and green are my favorite two colors, I thought I could whip something up for her quickly.

For this scheme - I would start with a blue wall.  Either a bold blue for the whole room, or an accent of a bold blue wall behind the bed.  Trim could be natural wood or white, keep the floor neutral with carpeting or hard wood floors (warm hard wood floors would look great here).


Items from Target: Bedding - Summer Fields, Dresser & Nightstand - Pepe, Castela Trunk, Home Microplush, ClosetMaid 9 Cube Storage Unit, Room Essentials Medium Storage Bin in Green & Blue, Splat Clock.
Items from Crate & Barrell: Swell Peacock Table Lamp, Boka Lime Table Lamp
Items from Bed Bath & Beyond: Wall Mount Memory Board

The bright colors keep this theme fresh & fun.  You could do just about any window treatment in this room - grommeted floor length curtains over a rattan shade would probably be my preference.

One big requirement for every child's room is storage.  I tried to take that into consideration with this board.  You will see a large dresser, two end tables, a rattan storage bin for the end of the bed, as well as a 9-cube bookshelf.  Toss in a few blue and green bins to keep up with the theme.  You could add a dark wood desk & bright green desk chair, a tall dresser with fun mirror & even a great set of wall shelves for extra storage.

This room tends to lean toward a teen's style, more than a child, but a few changes could make the room more child-like.  You could decorate the nightstands with less modern lamps & a fun clock.  A bedspread that was a little less mature or even just a simpler pattern (like green and white stripes) could make this more fun for a toddler, but I think this is a very sophisticated kids room here.  The bedspread above could lend itself a little to the feminine side the way it is shown, but if you take off the bed skirt & the accent pillows, and use lime green sheets, I feel that it would be totally gender neutral.

Tuesday, January 18, 2011

Bedroom Organization

We officially purchased the drop cloths for our basement curtain project this weekend.  I'll be updating you on the process soon.  We got three 6'x9' drop cloths.  I'll explain the whole decision process later, but it should be perfect for completing our task.  Just working on acquiring the curtain rod (whatever we choose to get) and then we will really be moving.

In the meantime, I have decided to load up the site with great money saving tips & organizational tips.  Because organization is a big part of our 2011, I'm making it a big part of yours!  Another trip to Martha's site & more great knowledge for your home.  Here is a quick look at some great Bedroom Organization Tips.

Under Bed Drawers:
Photo: marthastewart.com
You can buy or make these drawers.  You can even take old dresser drawers and add casters.  Put a bed skirt on the bed if you'd like to hide them, or keep them clean and display them.

Shelf Dividers:
Photo: marthastewart.com
I've talked about the joys of shelf dividers before.  You want to corral all of your bags, but lining them up on the top shelf takes up the whole shelf - put up two organizers and keep them on display but all together.  These are an excellent idea, and we plan on using some form of them in our future closet project.

Walk By Closet:

Photo: marthastewart.com
 We plan on doing something like this in our room.  In old houses like ours, there isn't an extra square foot to squeeze in more closet space.  Our room has one closet that is 5'-0" long.  We plan on making shelving units for an entire wall of our room - we will hang flowing curtains in front of it, and nestle in a window seat.  It will give us a TON of additional storage, and keep things organized.

Jewelry Storage:

Photo: marthastewart.com
If you have an extra drawer, using old teacups or votive holders is a great way to keep jewelry organized.  Separate by color, or style - it's a display while being great storage.

Bedside Stepladder:
Photo: marthastewart.com
If you need some additional storage, but don't have the space, or the money for an end table, this is a great idea.  Pick one of these up from a garage sale.  You could even spray paint it a vibrant color to make a statement.

Check out all of her other great ideas at this link:  Bedroom Organization

Also, check out our DIY Everything Tab for lots of links to information on how to fix everything.  The list is growing every day!

Saturday, January 15, 2011

Quick Mantle Refresher

This week all of the Christmas decorations came down.  Alas the Christmas joy is gone, but it definitely gave us our Living Room back!  One of the gifts we got for the holiday was a pair of metal scroll pillar candle holders.  We wanted to flank the mirror over the fireplace with these, so we decided to take on the project last night.

Here is the fireplace and mantle area before the new addition:

This turned out to be about a 15 minute project.  A little quick math, a few wall anchors and screws to hang the wall art from... it was all we needed to freshen up this area.  We wanted to center the scrolls on the wall space remaining on either side of the mirror and center them on them on the mirror as well.


We wanted to use the wall anchors to be sure that once we added the weight of the pillar candles, it wouldn't pull a simple screw out of the wall.  we used a small size anchor, and screwed the screw into the anchor about 80% of the way, leaving just enough out to hang the art.

And here is the after photo:

It looks like the one candle is leaning forward a bit, I'll be bending it a little to even them out once I'm done with this post!  I'm still deciding what I'd like to do on the mantle.  Right now we are using it for a lot of picture display, but I might want to change that up a bit. 

This summer we need to repaint the mantle, for whatever reason, the first coat of paint did not adhere well, and now everything we put on the mantle sticks and then takes a little paint with them.  So another project for another day, but this was a quick one for our Friday night.

Friday, January 14, 2011

Money Saving Tips

I came across this topic on Martha Stewart's website & thought, "what a perfect topic to discuss".  It's a hard time to start a renovation blog, when everything you do costs money.  When money is tight, you can't do or buy much, ergo you are stuck talking about the things you'd like to do, until you run out of ideas.  That is not what I want this to become.  So in order to save you and me money, so that we can do the projects that we love, I wanted to pass along some money saving tips.

It's an issue that everyone is dealing with, in light of the current economic situation.  There are a lot of single-spouse income families, reduced salary families, or even those that are getting by on unemployment.  I want to highlight some of the areas where we are spending our money and try to help everyone save a few dollars, if I can.

Here are a few of my favorite of Martha's 50 tips on saving money.

Set your own personal budget:  We've never actually used a worksheet for this, but maybe we should.  If you click on the link at the bottom of the page and get to this tip, you can find her free worksheet to print out.  Or get another one similar to the one below.

Photo Credit: Link
Buy Bulk & Share:  We have a Costco membership, and for certain items, it's great.  For other items, it either isn't a great deal, or we couldn't possibly use all of the item before it expires.  Martha suggests splitting it with a friend.  Fab idea, not sure why I hadn't thought of it before.  Need rice for the winter.  Buy a 20 lb bag & split it with your friends.  Everyone chip in $5 and have rice for 6 months.  Sure it means you need to buy an airtight container or two to hold it, but it's way cheaper than spending 4.39 on a box with 8 servings!

Inexpensive Art:  Martha suggests taking pictures and blowing them up.  Other people have blown up photocopies of things they love.  I am in the process of deciding how to design some type of word/ letter art with our last initial.  All it costs is a few dollars for the frame and the print.

Photo from YoungHouseLove: Link

Flavored Water:  Try adding lemon, lime, cucumber, etc to you water instead of spending money on expensive water.  We might take this one step further and invest in a new soda stream machine.  They are finally getting popular enough that finding the refill canisters will be easy!
  
Budget Vases:  Why buy a fancy vase, when you can buy a cheaper clear one and paint it exactly how you want it.  Use enamel paint, or even spray paint to change the look.  We'll do some DIYs in the future about this!

Use Cloth Towels:  Instead of cleaning with paper towels, use cloth ones and wash them.  This is something I'd really like to get into doing, since paper towels are expensive!  Pick up some microfiber towels for cleaning up spills, cleaning the sink, dusting, washing dishes & counter tops.  Toss in the washer & wash.

Use Airtight Containers:  I'm a big fan of this, transferring dry goods to air tight containers - for lots of reasons.  It keeps things fresh, avoids the mess of a broken sugar bag all over your kitchen, and keeps bugs out of your food!  It also extends the shelf life of your food.

Adjust your Water Heater:  Set the temp to a 120 max & save some cash!

No Cost Wrapping Paper:  Get creative when wrapping gifts.  I talked about this a little over the Christmas season, check out some posts here and here to find out some cool ideas.

Maximize Air Flow:  You can use your fan to push hot air out or bring cool air inside in the summer.

Reuse Rainwater:  Have a few extra garbage cans?  Disconnect a downspout & position a large can under it so that instead of the water going into the storm sewer, you can collect it for watering plants & gardens.

Photo Credit: marthastewart.com

Buy Generic:  Generally "store brand" food is made by the same companies that make the brand name stuff.  Check out the ingredients on the back, so long as they aren't adding a bunch of preservatives to the generic stuff, go for it!

Low-Flow Showerhead:  If your showerhead is pre-1994, you could save some money by replacing it.

Plants for Air Purification:  Look up a list of plants that will clean the air instead of running a pricey purification unit in the house.

Photo Credit: Link


Vinegar, Baking Soda, Lemons:  These three items can make an arsenal of non-toxic cleaning products.

Programmable Thermostat:  If you don't have one, get one.  It will save you a ton on your heating bills by being able to adjust the temperature for when you are home.  Use an extra blanket and flannel sheets, and turn the heat way down at night to save extra cash.  Never have more than 4 degrees between steps though, you end up spending more money to go from 70 to 76 than from 72 to 76.  Use wisely :).

Run Appliances at Night:  Take advantage of off-peak energy rates for running the dishwasher, washer & dryer.

Unplug Electronics:  You know that green light that is always illuminated on your DVD player, or coffee pot?  That is actually running up your electricity bill.  Unplug unused appliances & electronics so save a few dollars on the electricity bill!

Well, those are my favorites.  Check out the website for the entire slideshow, click here:  Martha's Money Saving